NPP - Advanced Server Post Processing System - Gmod scripts
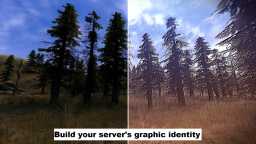
Assert your server's unique identity with NPP - Gmod Advanced Server Post Processing System: customize and synchronize advanced post-processing effects, optimized for superior performance. Offer your players a harmonious, captivating visual immersion, while giving your project a strong, unrivalled artistic signature.
❮
❯

Description of NPP - Advanced Server Post Processing System
Summary:- 📘 What is NPP - Gmod Advanced Server Post Processing System?
- 📕 NPP Addon Management Panel
- ⭐ VIP Content
- 👁️ Various enhanced and real-time editable visual effects
- ⚙️ Server Options
- 🔌 List of GLOBAL Gmod functions disabled by default
- 🚀 Optimization of the default post-processing effects
- ⚡ File size optimization
- 🧩 Gmod addons compatible with NPP
📘 What is NPP - Gmod Advanced Server Post Processing System?
NPP - Gmod Advanced Server Post Processing System is an advanced post-processing system to enhance the visuals of your Gmod server, but also optimizes the client. It's a tool that allows Gmod server administrators to optimize and customize post-processing visual effects in depth. With NPP, you can synchronize settings for all players connected to your server, improve performance and deliver a unique, professional visual experience.
Your gamemode will have a unique look, making your players forget they are visually in Gmod.
📕 NPP Addon Management Panel
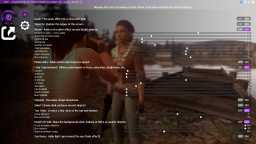
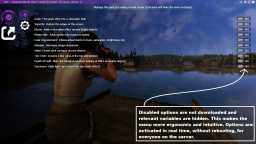
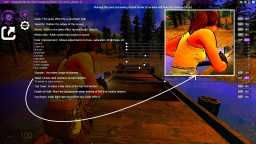
NPP includes an intuitive and user-friendly management panel. All visual effects are accessible through a clear menu that dynamically adjusts based on the options activated. Variables or functionalities that are disabled are hidden, simplifying management.
⭐ VIP Content
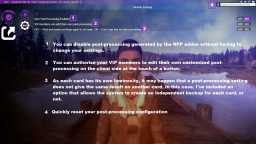
Give your VIP members an exclusive advantage: the ability to configure their own post-processing effects. This feature enhances the value of VIP status on your server while adding a unique touch of personalization.
👁️ Various enhanced and real-time editable visual effects
Enjoy these customizable visual effects in real-time:
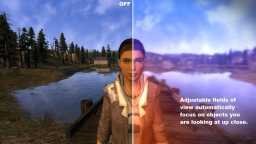
Dynamic Depth of Field (Dynamic DOF)
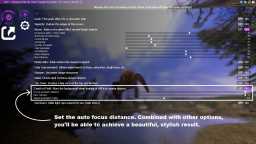
The dynamic depth of field is often referred to more precisely as depth of field (DoF in English). It defines the range of sharpness in an image, i.e., the extent of the distance between the nearest and farthest objects that appear sharp in a scene. Dynamic DOF introduces a depth blur effect that activates when the player focuses on nearby NPCs or objects. This simulates a focus on a subject.
Depth of field is a key tool for visual storytelling, allowing the manipulation of emotions, prioritization of visual information, or stylization of a scene.
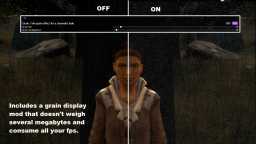
Grain
Adds a film grain effect, giving the image a cinematic or retro look. The grain effect remains a powerful tool for establishing mood, emphasizing a particular aesthetic, or evoking a specific era in the context of a film or screenshot.
Tilt-Shift (Toy Town)
Creates a blurred band at the top and bottom of the screen. This type of effect is called "tilt-shift" when used to create artificial depth of field, giving the impression that the image depicts a miniature scene. However, if you're simply referring to a blurred band at the top and bottom without the "miniature" effect, it can be an aesthetic choice or a tool to draw attention to the center of the image.
In some cases, it can also serve as a form of soft vignetting or a masking blur to soften the edges of the frame. This kind of effect is often used in cinema or photography to stylize the image or simulate a specific focus.
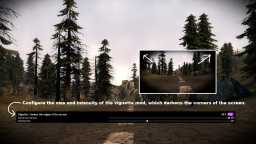
Vignette
Darkens the edges of the screen for an immersive and dramatic visual effect. This effect is adjustable in terms of intensity and size.
In photography or post-production, vignetting is often added intentionally to create an aesthetic effect or to direct attention to the center of the image.
Aesthetic uses of vignetting:
1- Focusing attention: By darkening the edges, the viewer’s gaze is naturally drawn to the center, where the main subject is often located.
2- Creating ambiance: Vignetting can convey a sense of mystery, intimacy, or nostalgia, or give an image a vintage feel.
The vignette effect remains a powerful tool for adding personality or guiding the visual interpretation of an image or scene.
Bloom
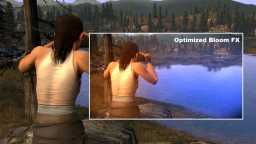
Adds a glow effect around bright objects, giving a sensation of radiant, pleasant brightness, ideal for enhancing light sources.
Motion Blur
Adds motion blur based on the player’s speed or the environment. This effect simulates the perception of speed and adds realism.
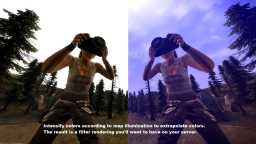
Color Improvement
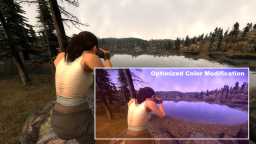
Allows the adjustment of hues, saturation, and brightness for optimized color rendering. Useful for fine-tuning the atmosphere of the map or achieving a specific visual effect.
Sharpen
Improves the clarity of images by enhancing details for a sharper and more defined look. The Sharpen effect increases local contrast around edges and details in an image. This gives the illusion of sharper imagery, even if the pixels themselves do not contain more information. Sharpen is an essential tool for making an image more impactful, but it must be used sparingly to avoid artifacts and preserve a natural appearance.
Sobel
Draws dark outlines around objects, creating a stylized graphic effect that highlights shapes.
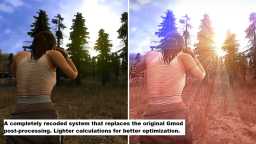
Sun Beam
Adds light rays around the sun, simulating a realistic and cinematic solar halo.
Associated settings:
Each effect includes detailed parameters to adjust intensity, size, or color influence (e.g., vignette intensity, grain transparency, red/green/blue tints, etc.). These settings allow fine-tuned customization based on your server's preferences or atmosphere. All connected players will see exactly what you've configured.
⚙️ Server Options
Easily configure NPP with these server options:
Global deactivation: Instantly disables NPP for all players.
VIP advantage: Allows your VIP members to customize their own post-processing effects.
Map-specific configuration: Activates specific post-processing for each map, ideal when lighting differs significantly between maps.
GLOBAL functions override: Allows my system to disable all default rendering hooks and GLOBAL functions related to these effects for better client-side performance.
🔌 List of GLOBAL Gmod functions disabled by default
To maximize performance, Gmod's default visual effects (e.g., DrawBloom, DrawSobel) are disabled. This optimization ensures resources are used exclusively for NPP's advanced and customized features. An option allows reactivating these features if needed.
Affected Gmod GLOBALs: DrawSunbeams, DrawBloom, DrawMotionBlur, DrawColorModify, DrawSharpen, DrawSobel, DrawBokehDOF, DrawToyTown
🚀 Optimized functionality of original post-processing effects
Before adding its own layer, NPP - Gmod Advanced Server Post Processing System significantly optimizes client-side performance by disabling unnecessary hooks and enhancing Gmod's native visual effects.Gains include a reduction in CPU/GPU load of up to 30-50%, thanks to the optimization of global functions such as DrawSunbeams and DrawBloom, and lighter management of effects. With ultra-light files (128 Kb in total), NPP also reduces connection times by 10-20%. These improvements guarantee a smooth, aesthetically pleasing experience, particularly appreciated by players on modest machines.
Discover significant performance improvements on Garry's Mod original post-processing effects in addition to those added. Here are the optimizations made on various effects, expressed in percentages:
DrawSunbeams: Significantly improved performance
DrawBloom: Significant optimization
DrawMotionBlur: Significant improvement in fluidity
DrawColorModify: Improved resource management
DrawSharpen: Optimized calculation
DrawSobel: GPU load reduction
DrawBokehDOF: Faster, smoother processing
⚡ File size optimization
NPP is designed to minimize the impact on connection and download times:
File sizes:
Client (Lua): 32 KB.
Server (Lua): 8 KB.
Configuration (Lua): 6 KB.
Workshop (Material): only 82 KB.
These optimizations ensure fast and smooth connections for all your players.
🧩 Gmod addons compatible with NPP
NPP is fully compatible with a wide range of Gmod addons. It integrates seamlessly with your existing systems.
Wiki of NPP - Advanced Server Post Processing System

Path: garrysmod/addons/norda_postprocess_system
- The AddWorkshop function is automatically added to the script server file and can be deactivated from the configuration file. : resource.AddWorkshop( 3369864215 )
- To add gmod workshop resources to your collection : NPP - Advanced Server Post Processing System [Content Only] | Gmod Workshop
Or with the shortcut button in my admin system: Nor admin System
Switch the button to ON for the line: Grain.
Related options will appear, which you can adjust using sliders:
Grain Size: Adjusts the size of the displayed grain.
Grain Transparency: Higher values make the grain less transparent.
Switch the button to ON for the line: Vignette.
Related options will appear, which you can adjust using sliders:
Darkening Intensity: Increases the darkening effect in the corners.
Vignette Size: Adjusts the size of the darkened corners on the HUD.
Switch the button to ON for the line: Color Improvement.
Related options will appear, which you can adjust using sliders:
Hue: Adjusts the overall tone of the colors.
Saturation: Controls the intensity of the colors. Higher values result in vivid colors, while lower values make them more muted.
Brightness: Adjusts the overall clarity of the image.
Switch the button to ON for the line: Bloom.
Related options will appear, which you can adjust using sliders:
Darkening: Adjusts the overall darkening level around bright areas.
Brightness: Controls the intensity of light sources affected by Bloom.
Horizontal Size: Adjusts the horizontal extent of the effect.
Vertical Size: Adjusts the vertical extent of the effect.
Number of Passes: Determines the number of layers applied to create a more detailed effect.
Color Saturation: Influences the richness of colors in the light effect.
Red, Green, Blue Influence: Enhances or reduces the dominance of a specific color in the effect.
Switch the button to ON for the line: Motion Blur.
Related options will appear, which you can adjust using sliders:
Added Blur Alpha: Adjusts the transparency of the motion blur.
Drawn Blur Alpha: Controls the density of the visible blur.
Blur Delay: Determines how long the blur persists before fading.
Switch the button to ON for the line: Sharpen.
Related options will appear, which you can adjust using sliders:
Sharpness Contrast: Increases the contrast of details to enhance clarity.
Sharpness Distance: Adjusts the intensity of sharpness based on the distance of objects.
Switch the button to ON for the line: Sobel.
Related options will appear, which you can adjust using sliders:
Sobel Contour Threshold: Controls the sensitivity of the effect to detect edges.
Switch the button to ON for the line: Toy Town.
Related options will appear, which you can adjust using sliders:
Focusing Distance: Adjusts the central blur intensity to simulate a miniature effect.
Blur Percentage: Determines the size of the blurred bands at the top and bottom of the screen.
Switch the button to ON for the line: Dynamic Depth of Field.
Related options will appear, which you can adjust using sliders:
Focus Activation Distance: Sets the distance at which the focus effect activates.
Blur Intensity: Controls the strength of the blur applied to out-of-focus areas.
Node Spacing: Adjusts the density of blur layers for precise rendering.
Switch the button to ON for the line: Sun Beam.
Related options will appear, which you can adjust using sliders:
Darkening Level: Adjusts the intensity of the darkening effect around the beams.
Beam Alpha: Controls the sharpness or transparency of the beams.
Sun Multiplier: Influences the brightness of the visible sun rays.
Go to the Module Settings menu.
Set the Sync Post Processing option to OFF.
This will instantly disable all post-processing effects generated by NPP.
Enable the VIP Mod option by setting it to ON in the NPP Addon Management Panel.
This allows them to adjust their own visual effects directly from their interface, enhancing the value of their VIP status on your server.
Enable the Multi Map option by setting it to ON in the NPP Addon Management Panel.
This allows you to configure unique settings for each map, tailored to its lighting, atmosphere, or visual style, delivering full immersion to your players.
Creator: Norda Scripts
| Sales | 46 |
| Published | 1 year |
| Last update | |
| Version | version 1.9 |
| DRM | Yes |
| Categories | Gmod addons |
| Requierements | Garry's Mod Server |
| Languages | 🇬🇧 🇫🇷 |
| Optimisation Gameplay Allgamemode | |
